반응형
목적
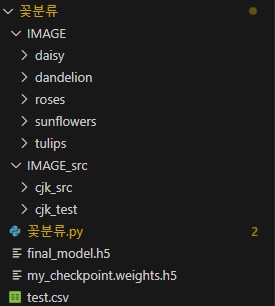
- 꽃이미지를 분류하는 모델을 만들어보자(MobileNetV2 사용)
1. 필요한 라이브러리 불러오기
import os
import tensorflow as tf
from tensorflow.keras.preprocessing.image import ImageDataGenerator, img_to_array, load_img
import numpy as np
import pandas as pd
import matplotlib.pyplot as plt
from tensorflow.keras.callbacks import EarlyStopping, ModelCheckpoint, ReduceLROnPlateau
2. 이미지 폴더 생성
# 꽃 종류 리스트
categories = ['daisy', 'dandelion', 'tulips', 'roses', 'sunflowers']
base_dir = 'IMAGE'

# 각 카테고리 폴더 생성
for category in categories:
    os.makedirs(os.path.join(base_dir, category), exist_ok=True)

#(1) IMAGE/Negative 와 IMAGE/Positive에 파일 분류해서 넣기
import shutil

# 이미지 폴더 있는지 확인
if not os.path.exists('IMAGE'):
    os.mkdir('IMAGE')
if not os.path.exists('IMAGE/daisy'):
    os.mkdir('IMAGE/daisy')
if not os.path.exists('IMAGE/dandelion'):
    os.mkdir('IMAGE/dandelion')
if not os.path.exists('IMAGE/tulips'):
    os.mkdir('IMAGE/tulips')
if not os.path.exists('IMAGE/roses'):
    os.mkdir('IMAGE/roses')
if not os.path.exists('IMAGE/sunflowers'):
    os.mkdir('IMAGE/sunflowers')

count=0
for filename in os.listdir("./IMAGE_src/cjk_src"):
    if filename.endswith('.jpg'):
        label=filename.split("_")[-1].split(".")[0]
        if(label=="daisy"):
          shutil.copy(os.path.join("./IMAGE_src/cjk_src", filename), os.path.join("IMAGE/daisy", filename))
        elif(label=="dandelion"):
          shutil.copy(os.path.join("./IMAGE_src/cjk_src", filename), os.path.join("IMAGE/dandelion", filename))
        elif(label=="tulips"):
          shutil.copy(os.path.join("./IMAGE_src/cjk_src", filename), os.path.join("IMAGE/tulips", filename))
        elif(label=="roses"):
          shutil.copy(os.path.join("./IMAGE_src/cjk_src", filename), os.path.join("IMAGE/roses", filename))
        elif(label=="sunflowers"):
          shutil.copy(os.path.join("./IMAGE_src/cjk_src", filename), os.path.join("IMAGE/sunflowers", filename))
3. 하이퍼파라미터 설정
num_epochs = 4
batch_size = 32
learning_rate = 0.001
4. 데이터 전처리 및 증강
# ImageDataGenerator를 사용하여 학습 데이터를 변형 및 증강(Augmentation)
image_datagen = ImageDataGenerator(
    preprocessing_function=tf.keras.applications.mobilenet_v2.preprocess_input,
    validation_split=0.2,       # 20% 데이터를 검증용으로 사용
    rotation_range=20,          # 이미지 회전
    width_shift_range=0.2,      # 가로 이동
    height_shift_range=0.2,     # 세로 이동
    shear_range=0.2,            # 시어 변환
    zoom_range=0.2,             # 확대/축소
    horizontal_flip=True,       # 좌우 반전
    fill_mode='nearest'         # 빈 공간을 주변 색으로 채움
)

# 학습 데이터 로드
train_generator = image_datagen.flow_from_directory(
    base_dir,
    target_size=(224, 224),
    batch_size=batch_size,
    class_mode='categorical',
    subset='training'  # 학습 데이터
)

# 검증 데이터 로드
val_generator = image_datagen.flow_from_directory(
    base_dir,
    target_size=(224, 224),
    batch_size=batch_size,
    class_mode='categorical',
    subset='validation'  # 검증 데이터
)
5. MobileNetV2 모델 불러오기;
# 사전 훈련된 MobileNetV2 모델 사용
base_model = tf.keras.applications.MobileNetV2(input_shape=(224, 224, 3), include_top=False, weights='imagenet')
base_model.trainable = False  # 사전 훈련된 가중치는 그대로 유지
6. 사용자 정의 레이어 추가
x = base_model.output
x = tf.keras.layers.GlobalAveragePooling2D()(x)  # 평균 풀링
output = tf.keras.layers.Dense(len(categories), activation='softmax')(x)  # 꽃 5종 분류

# 최종 모델 구성
model = tf.keras.Model(inputs=base_model.input, outputs=output)
7. 모델 컴파일
model.compile(optimizer=tf.keras.optimizers.Adam(learning_rate),
              loss='categorical_crossentropy',
              metrics=['accuracy'])
8. 콜백 설정
# EarlyStopping (과적합 방지)
es = EarlyStopping(monitor='val_loss', mode='min', verbose=1, patience=30)

# 모델 가중치 저장
checkpoint = ModelCheckpoint(filepath="my_checkpoint.weights.h5",
                             save_weights_only=True,
                             save_best_only=True,
                             monitor='val_loss',
                             verbose=1)

# 학습률 감소 (성능 개선이 없을 경우)
lrReducer = ReduceLROnPlateau(monitor='val_loss', factor=0.5, patience=2, min_lr=0.0001)

# 콜백 리스트
callbacks = [es, checkpoint, lrReducer]
9. 모델 학습
history = model.fit(
    train_generator,
    validation_data=val_generator,
    epochs=num_epochs,
    callbacks=callbacks
)
10. 학습 결과 시각화
plt.plot(history.history['accuracy'], label='Train Accuracy')
plt.plot(history.history['val_accuracy'], label='Validation Accuracy')
plt.xlabel('Epoch')
plt.ylabel('Accuracy')
plt.legend()
plt.title('Model Accuracy')
plt.show()
11. 모델 저장 및 불러오기
# 모델 저장
model.save('final_model.h5')

# 모델 불러오기
loaded_model = tf.keras.models.load_model('final_model.h5')
12. 테스트 데이터 준비
# 정답 데이터 생성
target=[]
label=[]
result=[]
for item in os.listdir("./IMAGE_src/cjk_test"):
    target.append(item.split(".")[0])
    if(item.split("_")[-1].split(".")[0]=="daisy"):
        label.append('daisy')
    elif(item.split("_")[-1].split(".")[0]=="dandelion"):
        label.append('dandelion')
    elif(item.split("_")[-1].split(".")[0]=="roses"):
        label.append('roses')
    elif(item.split("_")[-1].split(".")[0]=="sunflowers"):
        label.append('sunflowers')
    elif(item.split("_")[-1].split(".")[0]=="tulips"):
        label.append('tulips')
    result.append("")

df = pd.DataFrame({"target":target, "label":label, "result":result})
df.to_csv("test.csv")
final=pd.read_csv("test.csv")
13. 모델 예측 및 평가
# 클래스 매핑
answer_class = {0: 'daisy', 1: 'dandelion', 2: 'roses', 3: 'sunflowers', 4: 'tulips'}

right = 0
total = 0

# 테스트 이미지 개별 예측
for image, label in zip(final['target'], final['label']):
    total += 1
    test_image_path = f"./IMAGE_src/cjk_test/{image}.jpg"

    # 이미지 불러오기
    img = load_img(test_image_path, target_size=(224, 224))
    img_array = img_to_array(img)
    img_array = np.expand_dims(img_array, axis=0)
    img_array = tf.keras.applications.mobilenet_v2.preprocess_input(img_array)

    # 예측
    predictions = loaded_model.predict(img_array)
    predicted_class = np.argmax(predictions, axis=1)[0]
    pred_label = answer_class[predicted_class]

    # 정답 비교
    if label == pred_label:
        right += 1

# 최종 점수 출력
print(f"점수는: {right / total * 100:.2f}점")
최종코드
import os
import tensorflow as tf
from tensorflow.keras.preprocessing.image import ImageDataGenerator, img_to_array, load_img
import numpy as np
import pandas as pd
import matplotlib.pyplot as plt
from tensorflow.keras.callbacks import EarlyStopping, ModelCheckpoint, ReduceLROnPlateau

# 꽃 종류 리스트
categories = ['daisy', 'dandelion', 'tulips', 'roses', 'sunflowers']
base_dir = 'IMAGE'

# 각 카테고리 폴더 생성
for category in categories:
    os.makedirs(os.path.join(base_dir, category), exist_ok=True)

#(1) IMAGE/Negative 와 IMAGE/Positive에 파일 분류해서 넣기
import shutil

# 이미지 폴더 있는지 확인
if not os.path.exists('IMAGE'):
    os.mkdir('IMAGE')
if not os.path.exists('IMAGE/daisy'):
    os.mkdir('IMAGE/daisy')
if not os.path.exists('IMAGE/dandelion'):
    os.mkdir('IMAGE/dandelion')
if not os.path.exists('IMAGE/tulips'):
    os.mkdir('IMAGE/tulips')
if not os.path.exists('IMAGE/roses'):
    os.mkdir('IMAGE/roses')
if not os.path.exists('IMAGE/sunflowers'):
    os.mkdir('IMAGE/sunflowers')

count=0
for filename in os.listdir("./IMAGE_src/cjk_src"):
    if filename.endswith('.jpg'):
        label=filename.split("_")[-1].split(".")[0]
        if(label=="daisy"):
          shutil.copy(os.path.join("./IMAGE_src/cjk_src", filename), os.path.join("IMAGE/daisy", filename))
        elif(label=="dandelion"):
          shutil.copy(os.path.join("./IMAGE_src/cjk_src", filename), os.path.join("IMAGE/dandelion", filename))
        elif(label=="tulips"):
          shutil.copy(os.path.join("./IMAGE_src/cjk_src", filename), os.path.join("IMAGE/tulips", filename))
        elif(label=="roses"):
          shutil.copy(os.path.join("./IMAGE_src/cjk_src", filename), os.path.join("IMAGE/roses", filename))
        elif(label=="sunflowers"):
          shutil.copy(os.path.join("./IMAGE_src/cjk_src", filename), os.path.join("IMAGE/sunflowers", filename))
num_epochs = 4
batch_size = 32
learning_rate = 0.001

# ImageDataGenerator를 사용하여 학습 데이터를 변형 및 증강(Augmentation)
image_datagen = ImageDataGenerator(
    preprocessing_function=tf.keras.applications.mobilenet_v2.preprocess_input,
    validation_split=0.2,       # 20% 데이터를 검증용으로 사용
    rotation_range=20,          # 이미지 회전
    width_shift_range=0.2,      # 가로 이동
    height_shift_range=0.2,     # 세로 이동
    shear_range=0.2,            # 시어 변환
    zoom_range=0.2,             # 확대/축소
    horizontal_flip=True,       # 좌우 반전
    fill_mode='nearest'         # 빈 공간을 주변 색으로 채움
)

# 학습 데이터 로드
train_generator = image_datagen.flow_from_directory(
    base_dir,
    target_size=(224, 224),
    batch_size=batch_size,
    class_mode='categorical',
    subset='training'  # 학습 데이터
)

# 검증 데이터 로드
val_generator = image_datagen.flow_from_directory(
    base_dir,
    target_size=(224, 224),
    batch_size=batch_size,
    class_mode='categorical',
    subset='validation'  # 검증 데이터
)

# 사전 훈련된 MobileNetV2 모델 사용
base_model = tf.keras.applications.MobileNetV2(input_shape=(224, 224, 3), include_top=False, weights='imagenet')
base_model.trainable = False  # 사전 훈련된 가중치는 그대로 유지

x = base_model.output
x = tf.keras.layers.GlobalAveragePooling2D()(x)  # 평균 풀링
output = tf.keras.layers.Dense(len(categories), activation='softmax')(x)  # 꽃 5종 분류

# 최종 모델 구성
model = tf.keras.Model(inputs=base_model.input, outputs=output)

model.compile(optimizer=tf.keras.optimizers.Adam(learning_rate),
              loss='categorical_crossentropy',
              metrics=['accuracy'])


# EarlyStopping (과적합 방지)
es = EarlyStopping(monitor='val_loss', mode='min', verbose=1, patience=30)

# 모델 가중치 저장
checkpoint = ModelCheckpoint(filepath="my_checkpoint.weights.h5",
                             save_weights_only=True,
                             save_best_only=True,
                             monitor='val_loss',
                             verbose=1)

# 학습률 감소 (성능 개선이 없을 경우)
lrReducer = ReduceLROnPlateau(monitor='val_loss', factor=0.5, patience=2, min_lr=0.0001)

# 콜백 리스트
callbacks = [es, checkpoint, lrReducer]

history = model.fit(
    train_generator,
    validation_data=val_generator,
    epochs=num_epochs,
    callbacks=callbacks
)

plt.plot(history.history['accuracy'], label='Train Accuracy')
plt.plot(history.history['val_accuracy'], label='Validation Accuracy')
plt.xlabel('Epoch')
plt.ylabel('Accuracy')
plt.legend()
plt.title('Model Accuracy')
plt.show()

# 모델 저장
model.save('final_model.h5')

# 모델 불러오기
loaded_model = tf.keras.models.load_model('final_model.h5')

# 정답 데이터 생성
target=[]
label=[]
result=[]
for item in os.listdir("./IMAGE_src/cjk_test"):
    target.append(item.split(".")[0])
    if(item.split("_")[-1].split(".")[0]=="daisy"):
        label.append('daisy')
    elif(item.split("_")[-1].split(".")[0]=="dandelion"):
        label.append('dandelion')
    elif(item.split("_")[-1].split(".")[0]=="roses"):
        label.append('roses')
    elif(item.split("_")[-1].split(".")[0]=="sunflowers"):
        label.append('sunflowers')
    elif(item.split("_")[-1].split(".")[0]=="tulips"):
        label.append('tulips')
    result.append("")

df = pd.DataFrame({"target":target, "label":label, "result":result})
df.to_csv("test.csv")
final=pd.read_csv("test.csv")

# 클래스 매핑
answer_class = {0: 'daisy', 1: 'dandelion', 2: 'roses', 3: 'sunflowers', 4: 'tulips'}

right = 0
total = 0

# 테스트 이미지 개별 예측
for image, label in zip(final['target'], final['label']):
    total += 1
    test_image_path = f"./IMAGE_src/cjk_test/{image}.jpg"

    # 이미지 불러오기
    img = load_img(test_image_path, target_size=(224, 224))
    img_array = img_to_array(img)
    img_array = np.expand_dims(img_array, axis=0)
    img_array = tf.keras.applications.mobilenet_v2.preprocess_input(img_array)

    # 예측
    predictions = loaded_model.predict(img_array)
    predicted_class = np.argmax(predictions, axis=1)[0]
    pred_label = answer_class[predicted_class]

    # 정답 비교
    if label == pred_label:
        right += 1

# 최종 점수 출력
print(f"점수는: {right / total * 100:.2f}점")
반응형
'인공지능' 카테고리의 다른 글
| Image Data - 콘크리트 이미지 분류 모델(MobileNetV2) (0) | 2025.02.09 |
|---|---|
| Text Data - 네이버 영화리뷰 감정 분석하기(BERT) (0) | 2025.02.09 |
| Text Data - 문장 감정분류하기(BERT) (0) | 2025.02.09 |
| *빅데이터분석기사 대비! AI 총정리. Tabular, Text, Image (0) | 2025.02.09 |
| Tabular Data - 당뇨병에 걸릴 확률 회귀 (0) | 2025.02.09 |